kitchen renovation
Kitchen Renovation Electrical Planning: Induction Cooktops, Dedicated Circuits, and Coordinating Your Electrician With Your Cabinet Maker
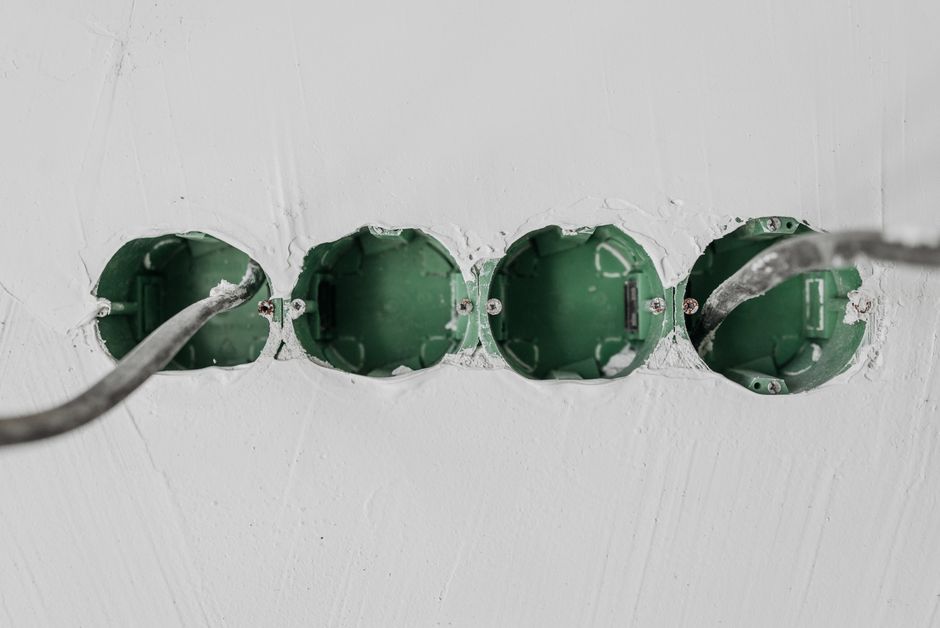
Renovating a kitchen in Sydney involves far more moving parts than most homeowners anticipate, from choosing the right induction cooktop to coordinating tradespeople so no one has to pull apart finished work. This article walks through the electrical decisions that need to be made before your cabinet maker lifts a single panel.
Why Kitchen Joinery and Electrical Planning Must Work Together
Your kitchen joinery (the custom cabinetry, overhead cupboards, island bench, and built-in pantry that give a kitchen its shape) is one of the largest single investments in any renovation. Yet it is also the element most likely to be damaged, delayed, or made permanently awkward when electrical planning is treated as an afterthought. The two trades are deeply interdependent, and on Sydney projects especially, getting the sequencing wrong is an expensive lesson.
Consider what happens in practice. A cabinet maker arrives on site and begins installing base units, only for the electrician to discover that a power point needs to sit exactly where a carcass panel now lives. Someone has to pull something apart. On larger European-style projects, think of the integrated approach championed by specialist joinery suppliers like Howdens Joinery, electrical and joinery layouts are designed concurrently from the start. That discipline saves time and money, and it is equally applicable to custom kitchen builds across Greater Sydney.
Key conflicts that arise when the trades are not coordinated include:
- Power points installed too low or too high for the finished benchtop height
- Induction cooktop circuits roughed in at the wrong wall location before the island position is confirmed
- Under-cabinet lighting channels left with no conduit pathway through finished carcasses
- USB and integrated power strips with no backing cavity allowed in the joinery design
The solution is simple in principle: bring your electrician into the conversation at the same time you brief your cabinet maker, not after the shop drawings are signed off.
Powering an Induction Cooktop: What Your Kitchen Joinery Layout Means for Electrical Load
Before your kitchen joinery is designed and your cabinet maker starts measuring up, the electrical side of your induction cooktop needs to be locked in, because the two are far more connected than most Sydney homeowners realise. The position of your cooktop within the joinery run, the depth of surrounding cabinetry, and the location of your switchboard all influence how your dedicated circuit is routed, what size cable is required, and whether your existing switchboard can handle the load.
What Load Does an Induction Cooktop Actually Draw?
Most residential induction cooktops draw between 7.2 kW and 10 kW at full capacity. In practical terms, that means:
- A dedicated 32A or 40A circuit is required: it cannot share a circuit with other appliances
- You'll need 6mm² cable as a minimum, and often larger depending on the cable run length from your switchboard
- The circuit must be protected by an appropriately rated circuit breaker and RCD in your switchboard
- Some high-output cooktops require a three-phase supply, something Castellano Electrical handles as a Level 2 ASP, including the network application with Ausgrid or Endeavour Energy
Does Your Switchboard Need an Upgrade?
Older Sydney homes, particularly those running on a 60A single-phase service, often don't have the spare capacity to support a modern induction cooktop alongside a dishwasher, oven, and air conditioning. A switchboard assessment before your renovation begins can confirm whether you need a service upgrade from single to three phase, or simply a new dedicated breaker in an already adequate board.
Getting this confirmed early means your cabinet maker can plan the cooktop cavity and adjacent drawer configuration with accurate clearance requirements, rather than retrofitting around electrical work done after the joinery is already installed.
Dedicated Circuits for Appliances: What Australian Standards Require in Your Kitchen Joinery Plan
When your kitchen joinery design is being finalised (appliance locations locked in, cabinet depths confirmed) your electrician needs to be working in parallel, not after the fact. Australian Standard AS/NZS 3000 (the Wiring Rules) sets clear requirements for dedicated circuits, and getting these roughed in before cabinetry is installed is far cheaper than retrofitting later.
Here is what the standards and practical Sydney installs typically demand:
- Induction cooktop: A dedicated 32 A or 20 A circuit (depending on the model's rated load) run directly from the switchboard, no shared circuits permitted.
- Dishwasher: Its own 10 A dedicated circuit, positioned within the joinery run to avoid trailing cables behind cabinetry.
- Refrigerator: A separate 10 A circuit is best practice; without one, a tripped circuit can mean a fridge full of spoiled food.
- Microwave and wall oven: High-draw appliances should each have a dedicated 20 A circuit, sharing a circuit with bench GPOs is a common and avoidable mistake.
- Rangehood: Often overlooked; a dedicated circuit prevents nuisance tripping when it runs alongside other appliances.
Each of these circuits originates at the switchboard, which may need upgrading to accommodate the additional load, something Castellano Electrical handles routinely across Greater Sydney as part of broader electrical services for renovations. If your switchboard is older or already near capacity, a load assessment before the kitchen joinery is ordered could save the project from a costly mid-build redesign.
Builder or developer managing the fit-out? Coordinating trades early is exactly the kind of job our team supports: you can submit a project enquiry to get a licensed electrician aligned with your cabinet maker's programme from day one.
Under-Cabinet Lighting and Integrated Power Points in Your Kitchen Joinery
Modern custom kitchen joinery is no longer just about storage and aesthetics: it's an active part of your home's electrical infrastructure. Under-cabinet lighting, integrated power points, and USB charging outlets are now standard expectations in a well-planned Sydney kitchen renovation, and getting the electrical rough-in right before your cabinet maker arrives on site is absolutely critical.
Plan the Cabling Before the Cabinets Go In
Once your upper cabinets are fixed to the wall, running new cabling behind them becomes expensive and disruptive. Your electrician needs to know the exact position of every cabinet, rangehood, and appliance tower so they can install concealed conduit and cable runs during the fit-out stage. Share your cabinet maker's plans with your electrician early, ideally at the same meeting, so both trades are working from the same drawings.
Under-Cabinet LED Lighting: Low Voltage or Mains?
Most modern under-cabinet LED strip systems run on 12V or 24V DC via a mains-powered driver. Your electrician should install a dedicated GPO inside the upper cabinet carcass to power the driver, keeping all mains voltage hidden within the joinery. This approach is far neater than surface-mounted cords and satisfies Australian wiring rules.
Integrated Power Points and USB Outlets
Flush-mounted power points installed within the splashback zone or inside a cabinet shelf are enormously practical for small appliances, phone charging, and benchtop devices. Key considerations include:
- Location: Power points must not be installed directly above a sink or within the restricted zone around a cooktop.
- Circuit load: Group lighting circuits separately from appliance circuits to avoid nuisance tripping.
- Joinery cutouts: Cabinet makers need precise cut-out dimensions before panels are finished, confirm these with your electrician first.
Coordinating these details between trades early prevents costly rework and ensures a seamless, professional result.
How to Coordinate Your Electrician and Cabinet Maker on Site for Seamless Kitchen Joinery
Getting your kitchen joinery and electrical work to align perfectly comes down to one thing: sequencing. When your cabinet maker and electrician work in the right order, and actually communicate with each other, you avoid the nightmare of drilling through a brand-new cabinet carcass to chase a cable that should have been roughed in three days earlier.
Here's a practical sequence that works well on Sydney kitchen renovations:
- First fix electrical before cabinets arrive. Your electrician should complete all in-wall cable runs, conduit, and rough-in work (including dedicated circuits for your induction cooktop, dishwasher, and refrigerator) before a single cabinet is installed. This is non-negotiable.
- Share the joinery plan with your electrician early. Cabinet makers work to millimetre tolerances. Your electrician needs the finalised kitchen joinery drawings (including island dimensions, overhead cabinet heights, and appliance locations) before they rough in anything.
- Mark power point and switch positions on the wall. Use tape or pencil to mark exact outlet heights relative to the finished benchtop, not the floor. Your cabinet maker can then build around confirmed positions rather than guessing.
- Second fix electrical after cabinets are set. Once carcasses are in place, your electrician returns to install power points, under-cabinet lighting connections, and any integrated power strips inside the joinery itself.
- Final check before doors and handles go on. Schedule a walk-through with both trades before the cabinet maker fits doors, drawer fronts, and hardware. It's far easier to adjust a cable or outlet position at this stage than after finishing.
A shared site schedule, even a simple shared spreadsheet, keeps both trades accountable and prevents costly return visits.
Careful electrical planning is what separates a kitchen renovation that looks polished from one that becomes a costly, disruptive rework. From sizing your switchboard for an induction cooktop to coordinating cable runs with your kitchen joinery, every decision connects. Lock in your electrician early, share your plans across all trades, and you'll have a kitchen that's as functional behind the walls as it is beautiful in front of them.
Written by Anthony Castellano
Founder & Level 2 ASP Electrician. More about Anthony.