howdens joinery
Howdens Joinery Cabinet Installation Tips: Preparation, Measuring and Marking for a Flawless Fit
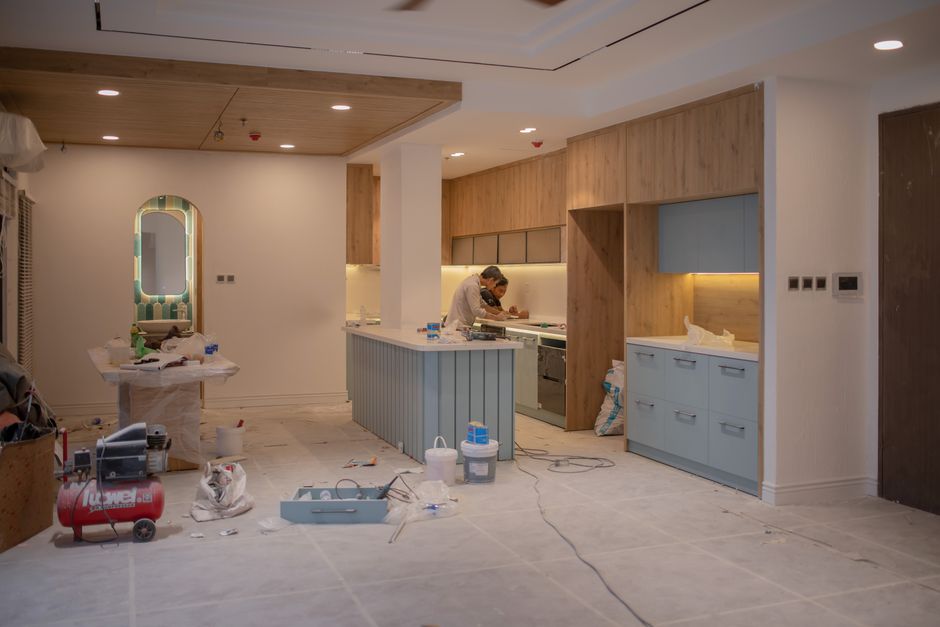
Getting Howdens joinery cabinets installed correctly comes down to preparation just as much as skill, and the steps you take before a single screw goes in can save hours of frustration later. Whether you are fitting a new kitchen from scratch or updating an existing one, this guide walks you through the practical details that make the job go smoothly.
Gathering Tools and Preparing the Space
Before you open a single flat-pack box, take time to assemble everything you need and clear the workspace properly. Howdens cabinets are precision-manufactured, so the quality of your installation depends heavily on having the right tools at hand from the start.
Essential tools to have ready include:
- A good-quality spirit level (at least 1200 mm long for checking wall and floor runs)
- A cordless drill with both driver and drill bits
- A tape measure and pencil for marking stud positions and cabinet heights
- A stud finder, particularly important in older Sydney homes where noggins are not always evenly spaced
- Clamps for holding cabinets together while you fasten them
- A jigsaw or hole saw for cutting around pipes and cables
- Shims or packers for levelling on uneven floors
Once your tools are sorted, strip the room back as far as possible. Remove skirting boards from the installation walls, check that the floor is reasonably level across the entire run, and mark a continuous horizontal datum line around the room at a consistent height. This reference line becomes your anchor point for every wall cabinet and base unit.
It is also worth locating and marking all existing electrical cables and plumbing runs before you start drilling. In kitchens especially, cables feeding power points, range hoods and under-cabinet lighting run behind the walls you will be fixing into. If there is any doubt about what is behind a wall, have a qualified electrician confirm cable positions before you proceed. Getting this step right protects both your cabinets and your safety.
Measuring and Marking for Accurate Cabinet Placement
Getting your measurements right before a single cabinet goes up is the most important step in any Howdens joinery installation. Rushing this stage causes frustrating problems later, from doors that won't align to gaps that look unprofessional. Take your time here and the rest of the job flows smoothly.
Start by finding the highest point of your floor using a long spirit level. This becomes your reference point for all base cabinet heights. Mark a level horizontal line around the entire room at the finished height of your base units, typically 870 mm from the floor's highest point. Every base cabinet sits relative to this line, not the floor itself.
For wall cabinets, mark a second level line to indicate the underside of the upper units. Standard practice puts wall cabinets 500 mm above the worktop level, though this varies with ceiling height and personal preference. Snap a chalk line across the wall and double-check it with your spirit level at multiple points.
Next, locate every stud or masonry fixing point behind the wall surface and mark them clearly with a pencil. Howdens cabinets rely on solid fixings, so knowing exactly where your structural support sits prevents weak installations that can pull away under load.
- Use a laser level for long runs of cabinetry to maintain consistent horizontal lines across the whole wall
- Mark centre lines for appliances like ovens and dishwashers before cabinets go in
- Account for pipework and electrical outlets early so cabinet positions don't conflict with existing services
- Double-check diagonal measurements in the room to identify any walls that are out of square
Rooms that appear square often aren't. Measuring diagonally from corner to corner confirms whether adjustments are needed before you commit to a layout. A few minutes spent checking now saves hours of corrective work later.
Assembling Howdens Joinery Cabinets Correctly
Getting the assembly stage right sets the foundation for a kitchen that looks professional and functions well for years. Howdens flat-pack cabinets are designed with straightforward construction in mind, but rushing this stage or skipping steps leads to cabinets that rack, bow or refuse to hang level on the wall.
Before you open the first box, lay out all components on a clean, flat surface and cross-check every part against the supplied cut sheet. Missing a cam lock or a shelf pin now is far less frustrating than discovering it mid-build. Then follow these core assembly steps:
- Pre-drill awareness: Howdens panels come pre-drilled from the factory. Never force a cam lock into the wrong hole, as the dowel pattern is specific to each panel orientation.
- Cam and dowel sequence: Insert all dowels first, then hand-tighten the cam locks before doing a final quarter-turn to lock. Over-tightening splits the particleboard and weakens the joint permanently.
- Back panel fitting: Slot the back panel in during assembly, not after. It acts as a squaring device. Once your cam locks are snug, check diagonal measurements across the carcass. Both diagonals should match within 2 mm.
- Base cabinet legs: Fit adjustable legs before mounting the carcass. Setting them to roughly 150 mm gives you enough travel to accommodate uneven floors during the installation phase.
- Wall cabinet hanging rails: Howdens wall units typically use a metal hanging rail system. Confirm the rail is level and secured into wall studs or appropriate fixings rated for the cabinet load, particularly in older Sydney homes where stud spacing can be inconsistent.
One practical tip worth noting from tradespeople working across Sydney builds: always assemble cabinets in the room where they will be installed. Carrying a fully assembled wall unit through a narrow hallway risks knocking joints loose and undoing careful work at the bench.
Securing Cabinets to Walls and Each Other
Once your cabinets are positioned and levelled, anchoring them correctly is what separates a professional-looking result from one that shifts, sags or comes away from the wall over time. Howdens joinery cabinets are designed to be fixed through the internal hanging rail at the top and bottom of the carcass, so locate your studs or use appropriate cavity fixings before driving a single screw.
- Wall cabinets: Use at least two fixings per cabinet into solid timber noggins or studs. If your wall is plasterboard only, use heavy-duty plasterboard anchors rated for the load. Howdens recommends 70mm screws into timber framing for a secure hold.
- Base cabinets: Fix through the back panel into the wall, keeping fixings above the shelf line so they stay hidden. On masonry walls, plug and screw with a 6mm masonry bit and wall plugs rated for the fixing diameter.
- Joining cabinets together: Clamp adjacent carcasses flush at the front face before drilling. Use connector bolts (sometimes called M6 barrel bolts) through pre-drilled holes in the cabinet sides, pulling the faces tight without bowing the panels.
A common mistake on renovation projects is overlooking the electrical rough-in behind base cabinets. If you are installing cabinets near a switchboard, meter box or any new power point position, make sure the electrical work is signed off before you lock in the cabinet run. For Sydney homeowners working on a kitchen or laundry upgrade, coordinating with a licensed Level 2 electrician early avoids costly cabinet removal later. Builders managing larger fitouts can submit a project enquiry to get electrical trades sequenced correctly with the cabinet installation schedule.
Check for square across the full run of cabinets using a long spirit level or a string line before tightening any fixings permanently. Adjust leg levellers first, then confirm the wall fixing positions are still correct after any height changes.
Fitting Doors, Hinges and Hardware to Howdens Cabinets
Once your Howdens carcasses are level, plumb and firmly fixed, fitting the doors and hardware is where the installation really starts to look professional. Take your time with this stage because small adjustments here make a big difference to the finished result.
Howdens supplies most of its door ranges with concealed cup hinges, typically 35mm Blum or equivalent soft-close fittings. Before drilling hinge cups, double-check your door overlay and confirm the hinge positions are consistent across every door. Mark hinge positions with a pencil and use a 35mm Forstner bit in a drill press or handheld drill with a depth stop. Consistency is everything here.
When mounting the hinge plates to the carcass, keep these tips in mind:
- Use the correct screw length: Over-long screws can break through the panel face, especially on 16mm carcass board.
- Check for square first: A carcass that is not perfectly square will cause door alignment headaches no amount of hinge adjustment can fully fix.
- Clip hinges in before hanging: Clip all hinges onto their plates before lifting the door into position so you can hang it cleanly in one go.
- Adjust in three directions: Modern Blum-style hinges adjust laterally, vertically and in depth. Work through one axis at a time rather than adjusting all three simultaneously.
For handles and knobs, a simple cardboard jig cut to your chosen fixing position saves time and keeps every handle consistent across a run of doors and drawers. Howdens drawer boxes with Legrabox or equivalent runners are largely self-adjusting once clipped in, but always check that drawer faces sit flush and parallel before tightening fixing screws permanently.
Finally, test every door and drawer under load before moving on. Soft-close mechanisms should engage smoothly without slamming or bouncing open.
Final Checks and Adjustments Before You Call It Done
Once all your Howdens joinery cabinets are fixed to the wall and connected to one another, resist the urge to start unpacking your crockery. A thorough round of final checks will save you from frustrating rework down the track.
- Check every cabinet for level and plumb. Run your spirit level across the top of the full run, both front to back and side to side. Even a small deviation becomes obvious once doors and drawers are fitted.
- Tighten all connecting bolts. Cabinet connector bolts can loosen slightly during the installation process. Go back along every join and give each one a firm tighten before fitting doors.
- Hang and align the doors. Howdens doors use adjustable concealed hinges. Adjust the depth, height and lateral position screws on each hinge until every door sits flush with its neighbour and the reveal is consistent across the run.
- Fit and adjust drawer boxes. Slide each drawer fully in and out, checking for smooth movement. Use the height and lateral adjustment on the runners to bring every drawer front into perfect alignment.
- Check all fixings into the wall. Give each cabinet a gentle firm push to confirm nothing shifts. Cabinets near power points or consumer mains equipment deserve extra attention, since any movement in that zone creates a safety concern best assessed by a licensed electrician.
- Inspect scribe mouldings and fillers. Press mouldings flat against walls and check for gaps. A thin bead of paintable sealant along scribes gives a clean, professional finish.
- Recheck all plinth clips and toe kicks. Plinths should sit tight to the floor with no visible gaps.
Completing a disciplined final inspection means your cabinetry will look factory-fitted and perform reliably for years to come.
From planning your wall layout and managing structural considerations through to hanging perfectly aligned doors, careful preparation is what separates a frustrating cabinet installation from a genuinely professional result. Work methodically through each stage, never skip the levelling steps, and always loop in a licensed tradesperson when your installation brings you close to any electrical infrastructure.
Written by Anthony Castellano
Founder & Level 2 ASP Electrician. More about Anthony.